Have you finished the main story of ANIMAL WELL and are hungry for more? The game holds a secret layer unlocked by a mysterious instrument: the Flute Codes.
Unlocking the Secrets: A Guide to All Flute Codes in Animal Well
The true magic of the Animal Flute lies in its ability to play specific melodies, each corresponding to a unique action. Deciphering these codes can be tricky, as they often rely on environmental clues or cryptic symbols scattered throughout the game. Here, we’ll unveil the most commonly encountered Flute Codes:
Fast Travel Room
- → → ← ← ↓ ↓ ↑ ↑
Play this melody to be whisked away to a central hub featuring animal-shaped tubes. This serves as your express travel network, allowing you to navigate the map with ease. You can use this code anytime, and additional tubes become accessible with further codes.
Flame Statue Room
- → ↑ ↗ ↑ ↓ ← ↙ ↓
This code transports you back to the central well’s bottom room. Here, you’ll deposit the four flames to unlock the final map area. This code acts as a shortcut after you acquire the clue, which becomes available towards the end of the game.
The Ostrich Area
The Ostrich Area holds five caged cats in desperate need of rescue. To liberate them, play the flute code corresponding to the symbol displayed above each cage.
- Square Cat Cage (↘ ← ↗ ↘ →)
- 2 Horizontal Lines Cat Cage (→ ↗ ↑ ↖ ↓)
- Cross / X Cat Cage (↖ ↖ ↙ ↙ ↓):
- Corner Square Cat Cage (← ↓ ↙ ↘ ↑)
- 2 Vertical Lines Cat Cage (↘ ↑ ↘ ↘ ←)

Once all five cats are free, use the Spinning Top item to unlock the Lynx Room, located up the ladder from the temple entrance, on the right. If you befriended the cats, the grateful Lynx will sing a melody that opens the final cage, revealing the Wheel item.
Wellhead
- ↘ ↖ ↘ ↖ ↘ ↖ ↘ ↖
The wellhead is typically accessed after defeating the final boss. Past the apartment, you’ll find a clock, a strange portal, and the wellhead itself. This code teleports you directly to the wellhead. Dropping down returns you to the central map.
Fast Travel Secret Room
- → ↑ ← ↓ ← ↓ ← ↓
There’s a hidden room tucked away within the fast travel area, accessible in the post-game. However, with the right code, you can reach it earlier. One of the bunnies will reveal this optional code.
Egg Room True Ending
- ↖ ↓ → ↓ ↖ – ↓ → ↓ ↖ ↙ – ↘ ↙ ↖ ↙ ↘
- ↙ ↗ ← ↓ ← – ↗ ← ↓ ← ↑ – ← ↘ ← ↑ ←
- ↘ ← ↖ ↓ → – ↓ ↖ ↓ → ↓ – ↖ ↙ ↘ ↙ ↖
- ↙ ↘ ↙ ↖ ↗ – ↖ ↙ ↗ ↑ ← – ↓ ↑ ↖ ↙ ←
- ↑ ↖ ← ↖

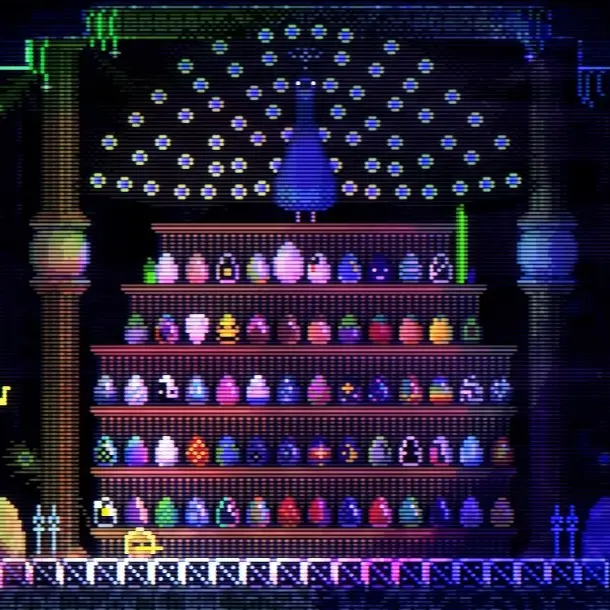
Head left from the map’s center to the large, optional Egg Room. Here, store all the eggs you find. Later, the UV Lamp reveals strange symbols on these eggs. Collect all 64 eggs, and they’ll spell out a hidden song. Additional clues for deciphering this song can be found with the UV Lamp in the translation room near the Manticore arena. Play this complete song to access the True Ending area.
Duck Figure
- → ← ↖ ↓ ↙ → ↙ ←
Play this melody to collect the Duck Figure. It automatically gets added to your inventory and appears on the shelf above the TV in the apartment you reach after finishing the normal game.
Secret Bunny via Duck Mural
- ↑ ↓ ↑ ↓ ← → ← →
Play this code at the Duck Mural on the map. This completes a hidden puzzle, revealing a secret bunny. Finding all the bunnies is crucial for unlocking the secret ending, as they grant access to a hidden path in the final area where you can control the Manticore.
Ghost Bunny
- ↑ ↗ → ↘ ↓ ↙ ← ↖ ↑
Near the map’s beginning, play this song to defeat a unique ghost. Unlike other encounters, there’s no candle here. Play the flute clockwise to banish this foe.
Starting Bunny
- → ↓ ← ↑ → ↓ ↖ ↗ → ↓ ← ↑ ↘ ↙ ↖ ↗
The game’s beginning offers a complex puzzle. Look for sparkles in the starting area – these provide flute directional clues. However, to solve the entire puzzle, you’ll need to consult three separate game files! Thankfully, the code itself remains constant. Play this flute code in the starting room to discover another bunny.
Apartment TV Bunny
- ↗ ↖ ↙ ↘ ↑ ← ↓ →
After defeating the Manticore and reaching the Apartment, use the remote to switch TV channels and observe the faces that appear. An earlier translation room reveals the flute direction corresponding to each face. Play the correct melody on the Flute to coax a bunny out of the TV.
Origami Bunny
- → ↗ ↑ ← ↖ ↑ ← ↓
Play this melody to summon a super-secret pair of bunnies. You can obtain the code by either folding a real origami bunny or deciphering the barcode on the bowl-shaped object in the Dog Area (down and right from the bear fast-travel tube). Feel free to tackle the complex solution yourself, or simply play the notes provided.
Vineyard Bunny
- → ↗ → ↓ → ↙ ↙ →

Head to the Vine Room with the Chinchilla in the lower-right corner of the Dog Area (accessible through the Bear Tube). Play this song here to befriend another bunny. This puzzle is notoriously tricky – on PC, you can help the Chinchilla by physically moving the shrunken game window!
Statue Dots Bunny
- ↖ ↑ ↘ ↓ ↙ ↓ ← ↓
Keep an eye out for small statues with dots scattered throughout the map. These dots correspond to directions on the Animal Flute. Finding the clues is manageable, but locating all the statues can be a challenge. Once you’ve discovered them all, line them up to reveal this code and unlock a hidden bunny.
Fish Mural Bunny
- ← ← ↘ → ↗ ← ← ↗
In the room featuring the massive fish mural, use the UV Lamp to reveal directional markings. Follow these markings and play the corresponding tune to befriend another hidden bunny.
