In the fast-paced world of EA FC 24, having the best camera settings can give you a competitive edge. If you’re wondering how to achieve that, we’re here to help.
How to Change Camera Settings in EA FC 24
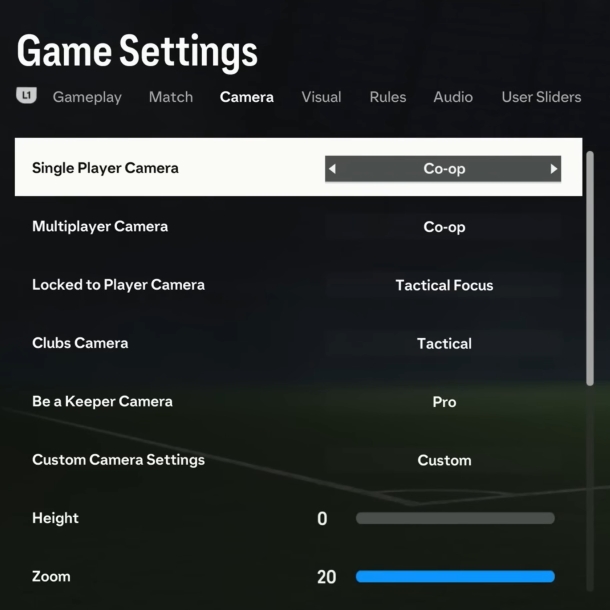
Before we dive into the ideal camera settings, let’s first ensure you know how to adjust them in the game. Follow these simple steps to make the necessary changes:
- Access the ‘Settings’ Menu: Navigate to the ‘Settings’ menu, either from the main menu or by pausing the game during a match.
- Access ‘Game Settings’: Once in the ‘Settings’ menu, proceed to ‘Game Settings.’
- Select the ‘Camera’ Tab: Scroll through the options until you reach the ‘Camera’ tab.
- Customize Your Settings: Within the ‘Camera’ tab, you’ll find various options to tailor to your preferences.

Best Camera Settings for Clubs
If you are playing with your own Pro player in Clubs mode, use these camera settings:
- Clubs Camera: Tactical
- Be a Keeper Camera: Pro
- Pro Camera Zoom: 10
- Pro Camera Speed: 10
- Pro Camera Swing: 10
- Power Shot Zoom: Off
Best Camera Settings for Ultimate Team
For the best camera settings in Ultimate Team, consider the following:
- Single Player Camera: Tele Broadcast
- Multiplayer Camera: Tele Broadcast
- Height: 13
- Zoom: 0
- Far Side Focus: 10
- Ball Tracking Speed: 0
- Penalty Area Zoom: 10
- Power Shot Zoom: Off
You can experiment with different settings to find what works best for you. For example, you may want to increase the zoom if you find that you’re having trouble keeping track of the ball. You can also adjust the height and far side focus settings to get a better view of the pitch.
Once you have found the best camera settings for you, be sure to save them so that you can use them again in the future.
With these optimal camera settings, you can fine-tune your visibility and control in both Ultimate Team and Clubs, giving you the edge you need to succeed in EA FC 24. Enjoy your enhanced gaming experience and dominate the pitch!
Related:
