Achieving optimal performance in Warzone Season 1 is crucial for a smooth and enjoyable battle royale experience. If you’re experiencing low FPS, stuttering, or freezing, don’t worry! These tips will help you identify and fix the problem.
How to Fix Low FPS, Stuttering, and Freezing in Warzone Season 1
Utilizing NVIDIA DLSS
Warzone utilizes NVIDIA DLSS, a technology that renders the game at a lower resolution but displays it at a higher resolution, boosting FPS. If your FPS is below your expectations, consider trying DLSS. While the visuals might not be as crisp, the performance boost can be significant.
Here’s how to enable NVIDIA DLSS:
- Launch Warzone and navigate to the “Settings” menu.
- Select the “Graphics” tab.
- Choose “Quality” and open the “Upscaling/Sharpening” drop-down list.
- Click on “NVIDIA DLSS.”
- For further options, click “Show More” to select “Quality” and “Sharpening.”
Adjusting In-Game Settings
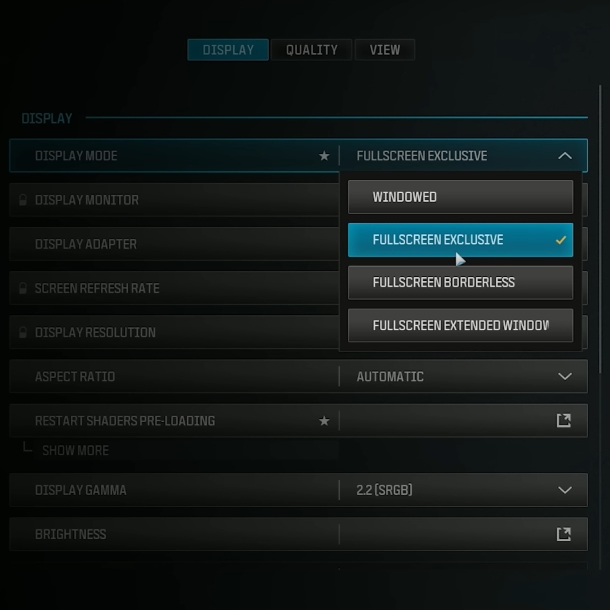
Start by reviewing your in-game settings. Disable graphics-intensive options that might be hindering your FPS. You might have inadvertently enabled settings like Fullscreen Borderless, which can lead to performance problems. Switching to Fullscreen Exclusive can significantly improve your gameplay.

Updating Drivers
Out-of-date drivers can be the culprit behind various issues, including FPS drops. Updating your NVIDIA drivers to the latest version can resolve various problems, including crashes. However, newer drivers might not always be optimal. If you encounter low FPS after updating, consider rolling back to a previous version. Here’s how:
- Open Device Manager.
- Expand Display Adapters.
- Right-click your graphics card and choose the “Drivers” tab.
- Click “Roll Back Driver” if available. Restart your PC.
- If the Roll Back option is unavailable, uninstall the current drivers manually and install a previous version from the NVIDIA website.
Hardware-accelerated GPU Scheduling
Warzone players have reported mixed results with this feature. Some have seen improvements, while others have experienced the opposite. If you’re unsure, experiment with enabling and disabling the setting to see if it impacts your FPS.
Here’s how to access this setting:
- Right-click on your desktop.
- Select “Display Settings.”
- Scroll down and click on “Graphics Settings.”
- Toggle the “Hardware-accelerated GPU scheduling” option on or off.
- Restart your PC.
Scan and Repair
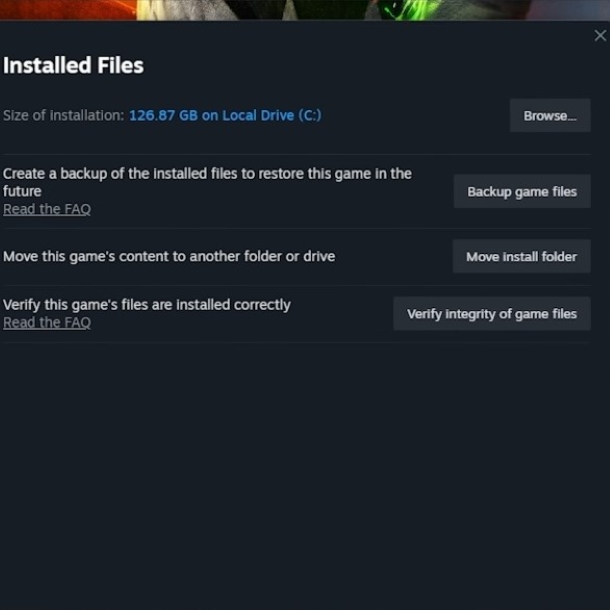
If Warzone’s FPS is considerably lower than other games with similar requirements, perform a Scan and Repair to identify and fix issues with the game files. Here’s how:
On Steam:
- Open Steam.
- Right-click on Call of Duty in your library.
- Select “Settings” and then “Properties.”
- Go to “Local Files” and click “Verify integrity of game files.”

On Battle.net:
- Launch Battle.net.
- Click on Call of Duty.
- Select the Cog icon next to “Play.”
- Choose “Scan and Repair.”
Enabling Weapon Motion Blur
In Warzone 2, some players encountered drastically low FPS at the beginning of matches. This issue, causing the game to resemble a slideshow, was fixed by enabling Weapon Motion Blur. While it might take some time to adjust to, enabling this setting can significantly improve your FPS and eliminate stuttering at the start of matches.
Reinstalling the Game
Reinstalling the game should be considered a last resort. If a Scan & Repair didn’t resolve the low FPS issues, reinstalling might be necessary. This will identify and fix any problems undetected by the Scan & Repair, hopefully resolving your performance issues.
By following these recommendations, you can optimize your Warzone Season 1 experience and dominate the battlefield with smooth, high-FPS gameplay.
Related:
